Jumpsuit Construction - Step by Step
- ashleyraynor1
- May 8, 2015
- 5 min read
We laid out all of our individual finished pattern pieces and assigned them to the fabric they were to be cut out of.

We did a lay plan for each fabric type in order to optimise the use of the fabric and to keep fabric wastage down.

When all the pieces were cut out we did a quick check that everything was correct and that we weren’t missing anything by laying all the pieces out onto the table in the shape of the jumpsuit.


We numbered all the pieces by writing the piece number on a scrap of paper and pinning it to the said piece. This was to ensure no confusion when we were sewing. The numbers corresponded to the highlighted plan I did earlier.
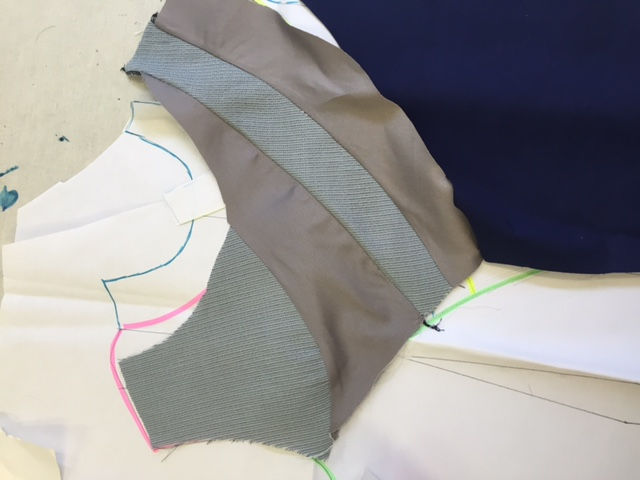
We started sewing our garment together via the sewing plan. Starting with the front of the jumpsuit.


This was the front piece of our jumpsuit finally finished and with no major hiccups.


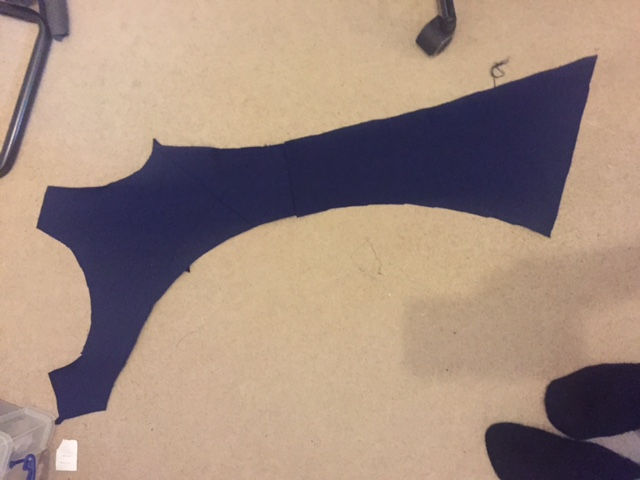
I started the back of the jumpsuit by following the sewing plan and pinning the first two pieces together (right side to right side)


I have a couple of places where four panel seams intersect and I had no idea how to conquer this and get it right. I sewed it how I thought best and got it right first time!


All of my panels were soon starting to build up.

The mink satin was fabric was quite hard to pin together and sew because, as it was right sides together, the fabric kept slipping. So it was quite a task to sew the seams on this one.


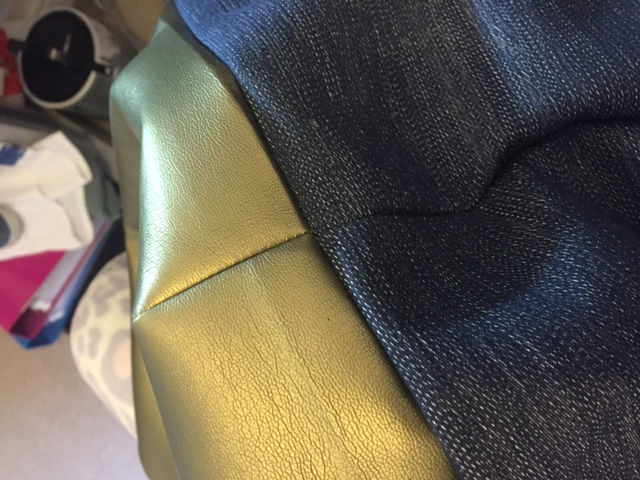
Next was sewing in the gold leather strip. I knew that sewing leather, satin and cotton together was going to be a task but I was well prepared for this.


The fabric was very hard to pin anyway because it was on a curve, not only that but the fabrics wanted to dance all over each other rather than stay still. The leather was very thick and you had to get it right first time! If not you had to unpick, and that meant holes in your leather that would never leave (see photo above).
Overlocking on the leather was a task too because it never quite seemed to work as I wanted it to, it is done now, but it always seemed to look a bit loose (picture below).


Getting these seams to match up perfectly was quite difficult. I used a trick that Val showed me last semester when we made our shirts. I placed a pin through the stitch line on one piece, at the point where I wanted the seams to intersect. I followed the pin through and pinned through the second sheet of fabric, again at the point where I wanted the seams to intersect. By sewing through this point it ensures your seams match perfectly (See above photo).

I also learnt that faux leather does not like the iron very much and tends to melt (obviously) but I forgot to place my cloth on top when pressing this seam and it made my fabric melt causing this unsightly ‘wrinkle’ where it has shrunk.


Next, I started on the sleeves. The right sleeve was in two pieces so I started by sewing these together to create the whole sleeve piece. I then placed the front of the jumpsuit and the back of the jumpsuit right sides together to straight stitch and overlock the shoulder seams together so I could start putting in my sleeves.


I pinned the shoulder notch of the sleeve to the shoulder notch on my jumpsuit and pinned these in place first before pinning the whole thing around the shoulder socket.


I straight stitched and overlocked the first sleeve in place.

Next, I had to insert the zip. Now, this should have been done a while back but there were complications due to the hood and sleeves that held off on the zip being inserted. I decided to leave the zip until the situation was resolved and then insert it like a box zip. By laying the zip on top of the fabric, measuring, marking, cutting and inserting. I learnt how to do this in the first semester in my Fashion Construction module.


I lay the zip on top of the back of the jumpsuit. I had always wanted this zip at an angle so I placed it like this and made sure the top of the zip was in a reasonable position to allow me to hem the neckline later.


once the zip was in the right place, I pinned it down one side. I undid the zip and cut along the centre line (where the metal teeth were). This saved me marking the fabric and ensured a straight cut that was the perfect length. I stopped cutting about 1cm from the end of the zip to allow me room to cut a ‘V’ shape to flip back to finish the bottom of the zip off.


I started to sew the zip in place. I also overlocked it because there was raw fabric that I didn’t want to get caught in the zip or fray.


I also finished off the end of the zip by tucking the ‘V’ shape underneath and straight stitching across the zip.


This is my finished zip and sleeves so far.

Now I had to close the sleeves and sew down the sides. I started by pinning the whole thing down one side. Sewing lightweight, mediumweight and heavyweight fabric together was a challenge so I’d always rather pin it first.


I sewed down both sleeves and both sides of the jumpsuit and overlocked it. It was now all done apart from the middle of the legs. I started by turning the jumpsuit inside out and sewing both legs closed. I then sewed in the opposite direction along the crotch to create the trouser legs and completely close them. This is what our jumpsuit looks like so far…


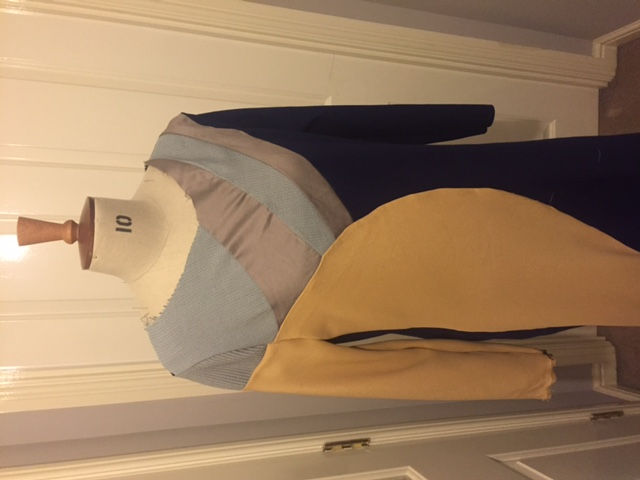
Next, I had to re-sew the right arm and the neckline as the stitching wasn’t great on either of these. This was our jumpsuit finished with only the hood to do now.


I bought these Prym Anorak 15mm press fasteners from Franklins. I got the heavy duty 15mm so that they would be strong enough to hold up the over sized hood and hold the weight of it.
I started on the outside denim part of the hood. I created the shell. I then used pinking sheers to trim down the excess seam allowance because, when teamed with the leather, it was going to be very thick when it came to top stitching.


With the denim part completed, I moved onto the leather interior.


I completed this part and then attached them both together. I left it open along the neckline because when I add my press studs I want them to be concealed inside here and then the hood sewn closed. This was you wont be able to see the poppers when the hood is worn, only when it is removed.


I then top stitched around the hood.


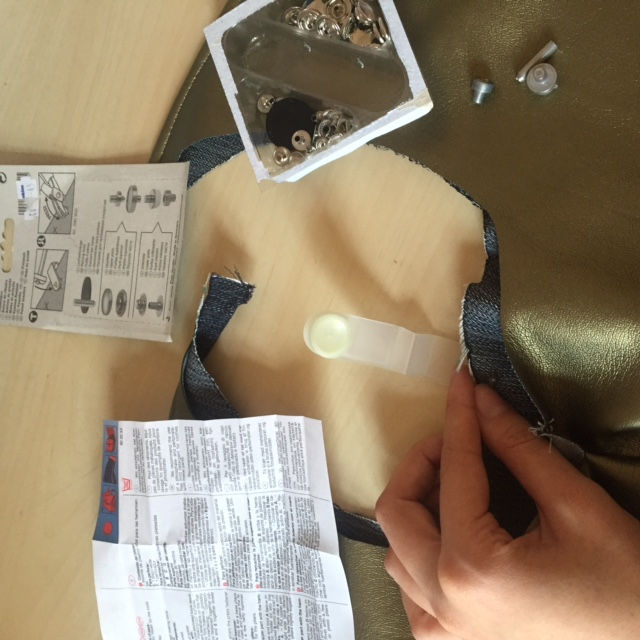
I struggled to add the poppers because they were so complex! But as you can see from the picture I am only adding them to the denim part so that it may be sewn closed after and you will not be able to see them.


Comments